User Story Backlog Hell
Suppose for a moment that you have a spreadsheet with three-hundred user stories in it. Stories gathered and written during many user story writing workshops. Or maybe you’re right at the beginning of your project, and you haven’t written any yet. Either way, you need to know which of them are the highest value features are so that you can build them next. A user story map can help you answer the question: “What should we deliver next that provides the most value?”. By creating user story maps you are generating options for value delivery.
It can be tricky to prioritise hundreds of stories divorced from their context and held in a spreadsheet or JIRA repository. Even more so if you are staring at a blank page wondering where to start. The temptation to build some ‘necessary infrastructure’ until we’re ready to build stuff for users or worse still create an arbitrary story value system based on the seniority of the requestor, can be huge.
Lucky for us then that Jeff Patton realised this early on and developed a technique to help us understand how our users might use our product and how to translate that into user stories that have a natural sequence and hierarchy.
Creating user story maps in workshops with users, UX, developers, testers and stakeholders, we can build a shared understanding of the product, a common domain language and an appreciation or empathy that spans more than just our particular interests. Bringing this cross-functional group together to map out the user’s journey, we can more easily drive out assumptions, risks and dependencies.
The benefits of using a user story map to create your backlog include:
- Takes the user perspective. Helping your users be more awesome is what makes products successful.
- Builds shared understanding in your team as you work together to visualise the product.
- Helps you understand and prioritise what the user needs next and get feedback that you can add to the map.
- Deliver value early by helping you see Goals and Activities in the context of the larger product.
- Highlights assumptions and risks that might be missed by a single viewpoint
- Uncovering dependencies earlier and faster with multiple viewpoints
What is a User Story Map?
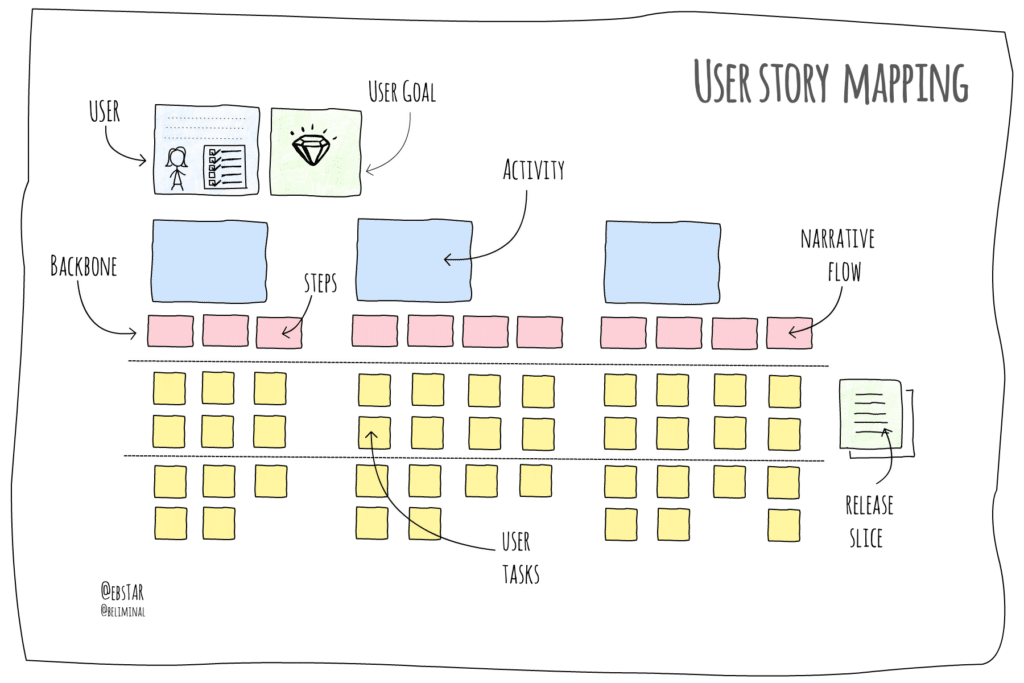
Story mapping visualises the user’s journey through our software in a step by step flow, creating a variety of user stories along the way. Compared to a flat backlog a user story map has added dimensions of position and movement through the landscape of your product, allowing you to first map and then navigate the entire user space of your product. With a user story map, you can see the whole picture in context, with a linear backlog, not so much.
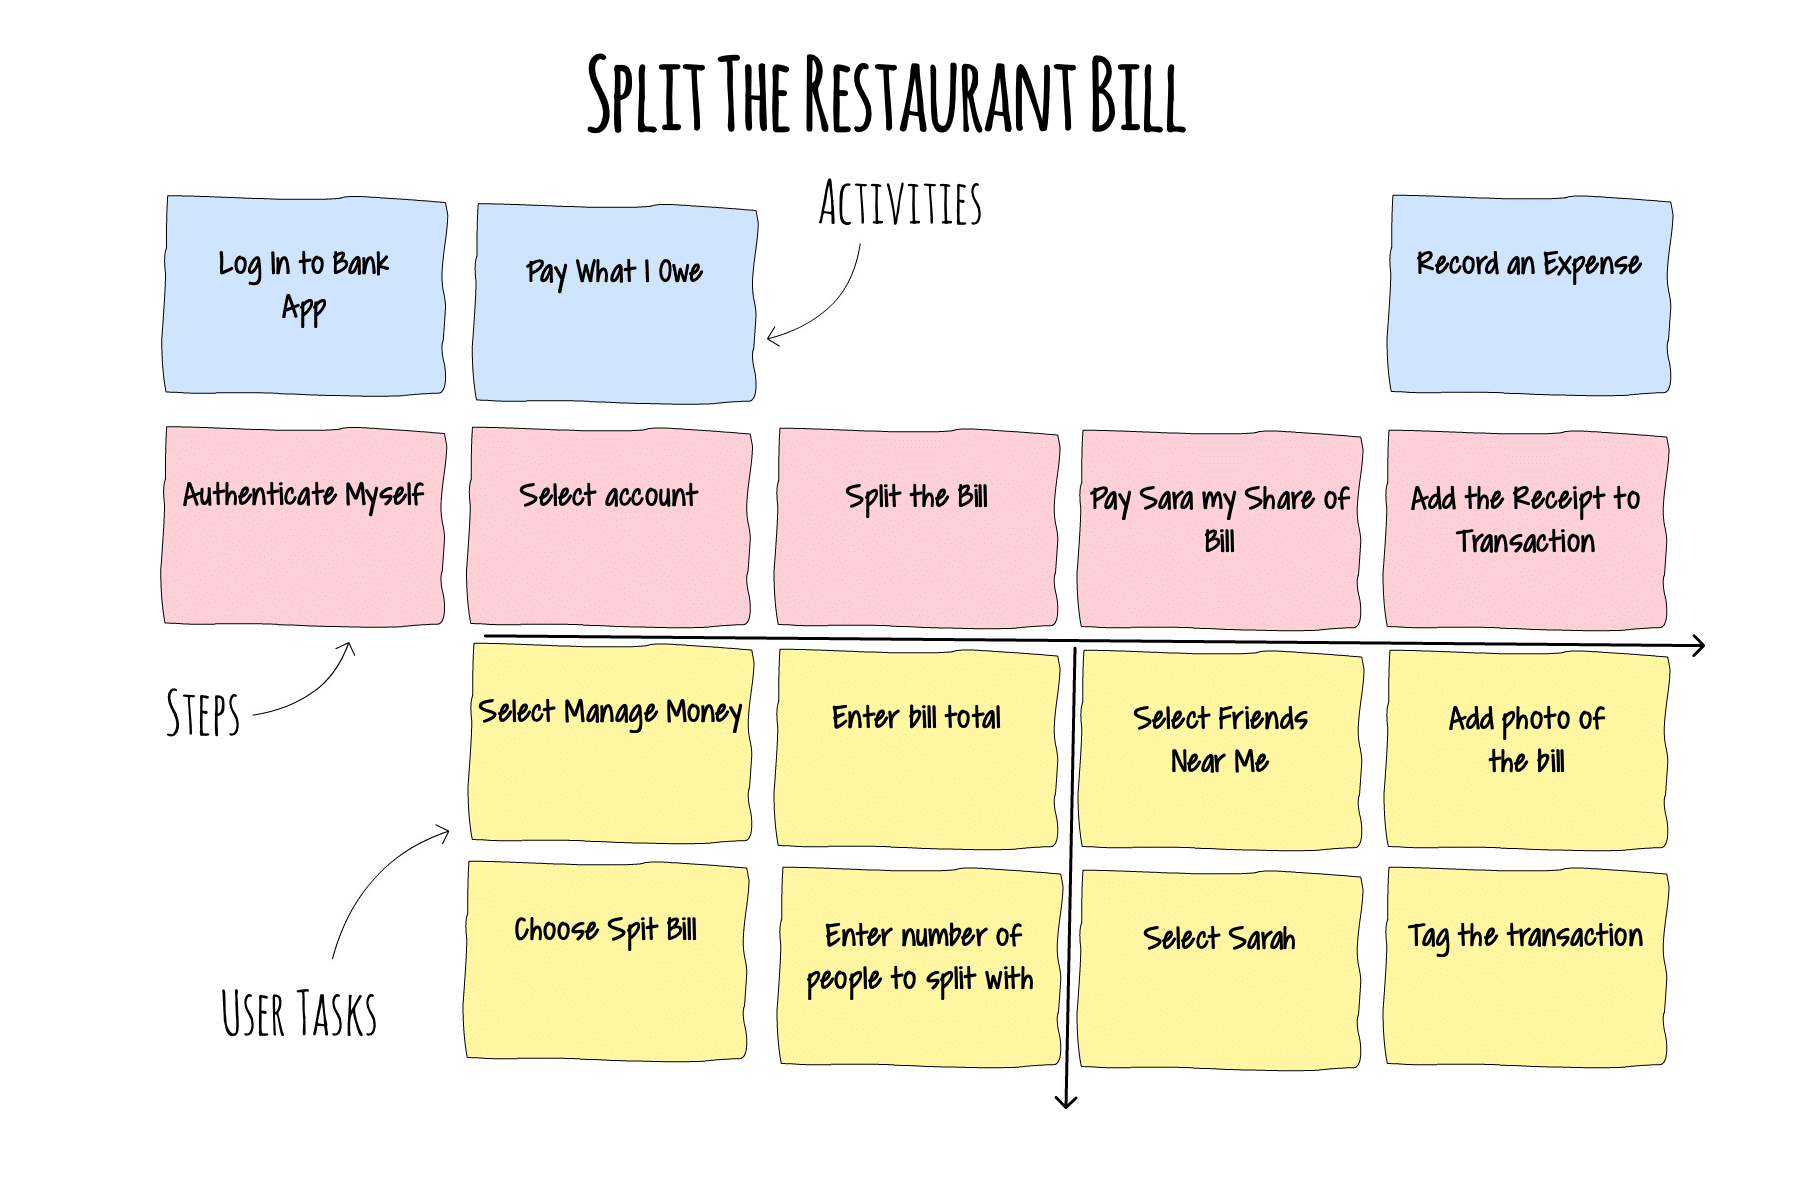
We map the steps the user takes towards their goal by telling the story or narrative of the user’s journey. That Goal can be big or small and made of one or many Activities. Within each step the user takes towards completing an activity, there is the added dimension of the various User Tasks that can be taken to achieve the step depending on the user and their context. *Note these tasks are nothing to do with a Scrum team’s sprint tasks.
There can be many different types of user, and each one could have a different reason for their activity or a different approach to their Goal. All of this can be mapped and understood so that we can make the best decisions about what to build next so that our users achieve their Goals using our software product.
Clients tell me that not only does story mapping help them make sense of their software by visualising it through the eyes of their users; it builds engagement and ownership with stakeholders.
A user story map is:
- A visual model of a Product Backlog from the users perspective
- A tool for deliberate product discovery and learning
- A way of creating a shared understanding
- A method of exploring product capabilities and features
- A prioritisation and release slicing tool
- A way to build consensus between product and delivery teams
- A visual representation of progress and scope
Story Mapping in 4 Simple Steps
Step 1: Set the context, decide on the Goal.
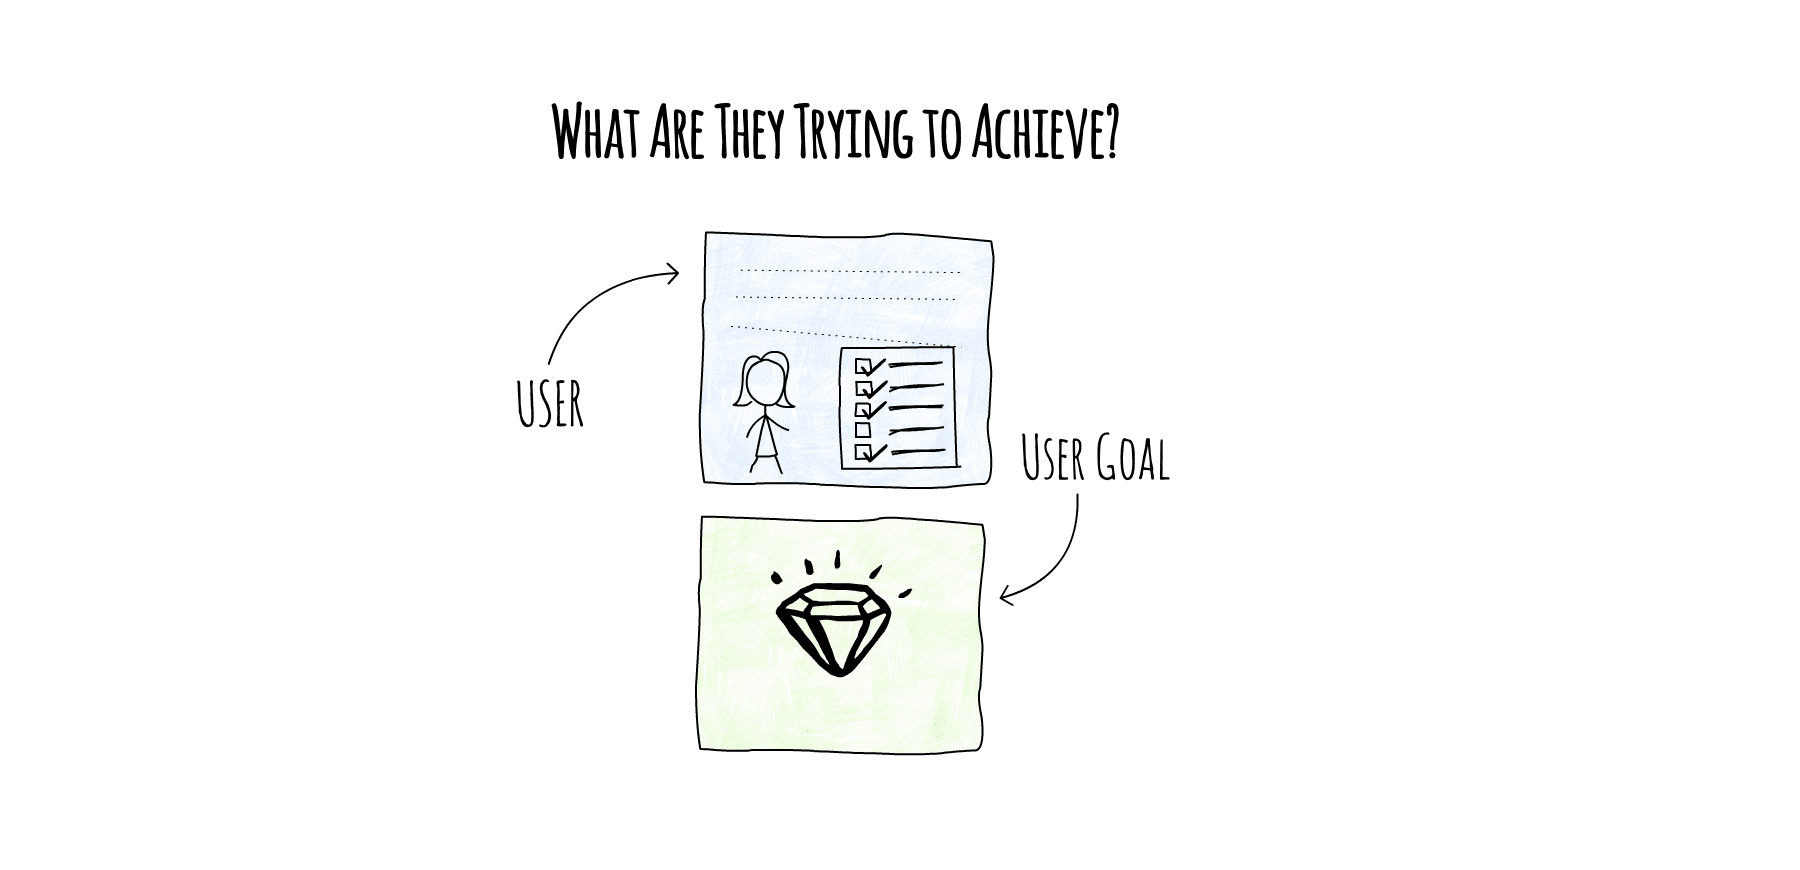 Before you can begin user story mapping, you want to choose a user Goal to set the context. Who is the user we are mapping for? What are they trying to achieve with their activity and why? What is the outcome they seek and how will we help them to achieve it?
You will need sharpies and coloured index cards or coloured post-it’s. Choose which colour you will use to identify Activities, steps and User Tasks.
- Make sure everyone is clear on the intended Goal for the Story Mapping session.
- Choose a user or persona that you are mapping for. Remember you are mapping from the perspective of the user (mostly).
- Select the outcome that the user is trying to achieve. What is their Goal or activity?
- Get a broad perspective by Inviting users, stakeholders, user experience, developers, testers, business analysts and project managers
- If there are more than 4-5 people, then break into groups and map a different Goal or Activity in each group and after a set time, feedback and then alternate what you are working on.
Step 2: Tell the user story.
 The core or backbone of a user story map is a narrative set of steps through the software as the user strives to achieve their Goal or complete their activity. You will be tempted to discuss all sorts of detail and edge cases in an attempt to mitigate risk or prove how valuable you are to the project. Resist this urge and focus on telling the story of the journey the user takes to achieve their Goal.
- Have a user or subject matter expert tell a story about how the user will achieve their outcome. Walk through it step by step until the outcome is achieved.
- The rest of the team write down the steps or activity as they hear them. One idea per card so that they can easily be moved around.
- Go wide not deep. Details will evolve later.
- Focus on the narrative flow.
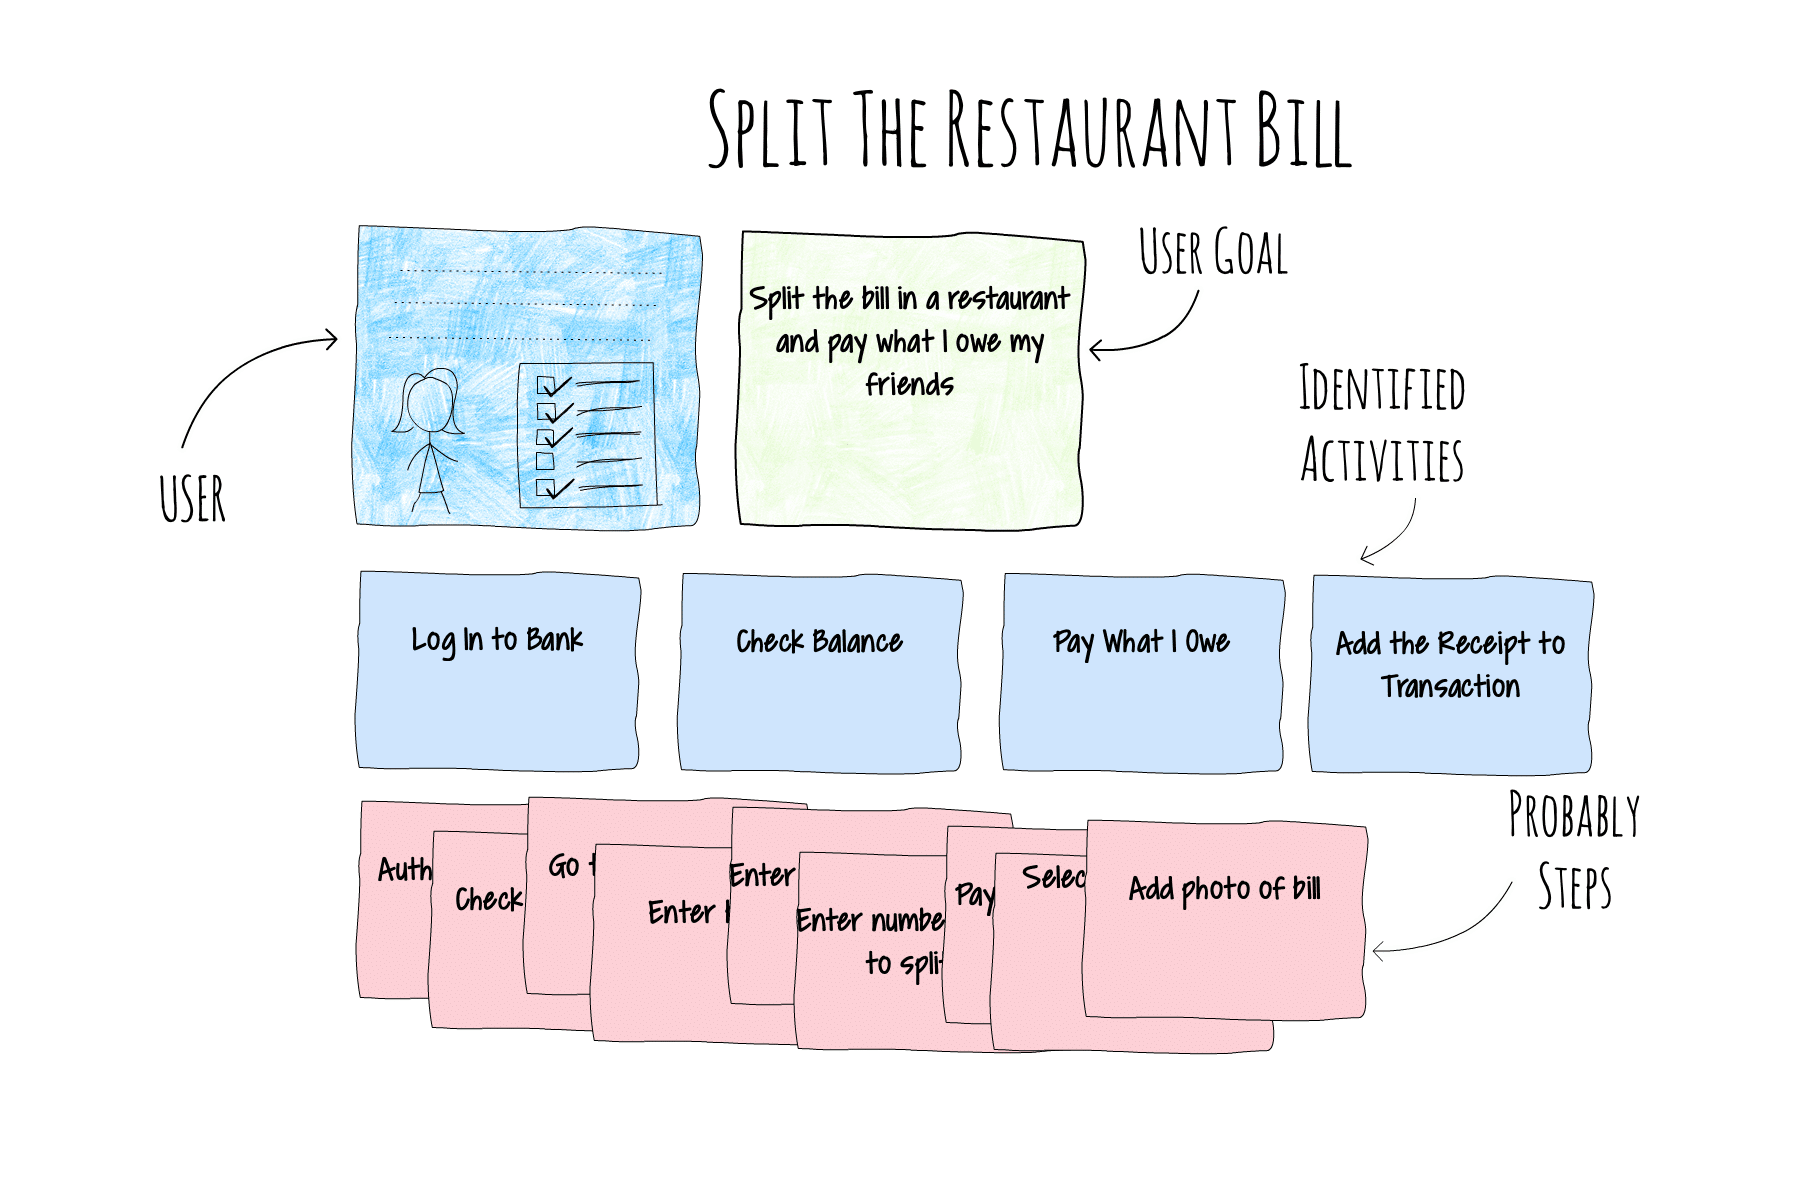
- Some of the things you capture will be significant Activities; some will be steps that help that activity happen.
- Lay your cards on the table and group these Steps together into Activities.
- Identify and place the Activities in sequence from left to right and place any Steps that help fulfil the activity beneath.
Step 3: Create the backbone of steps
 The map is not the territory: Remember the user story map is not the product; it is a guide used to generate shared understanding and to aid development and planning.
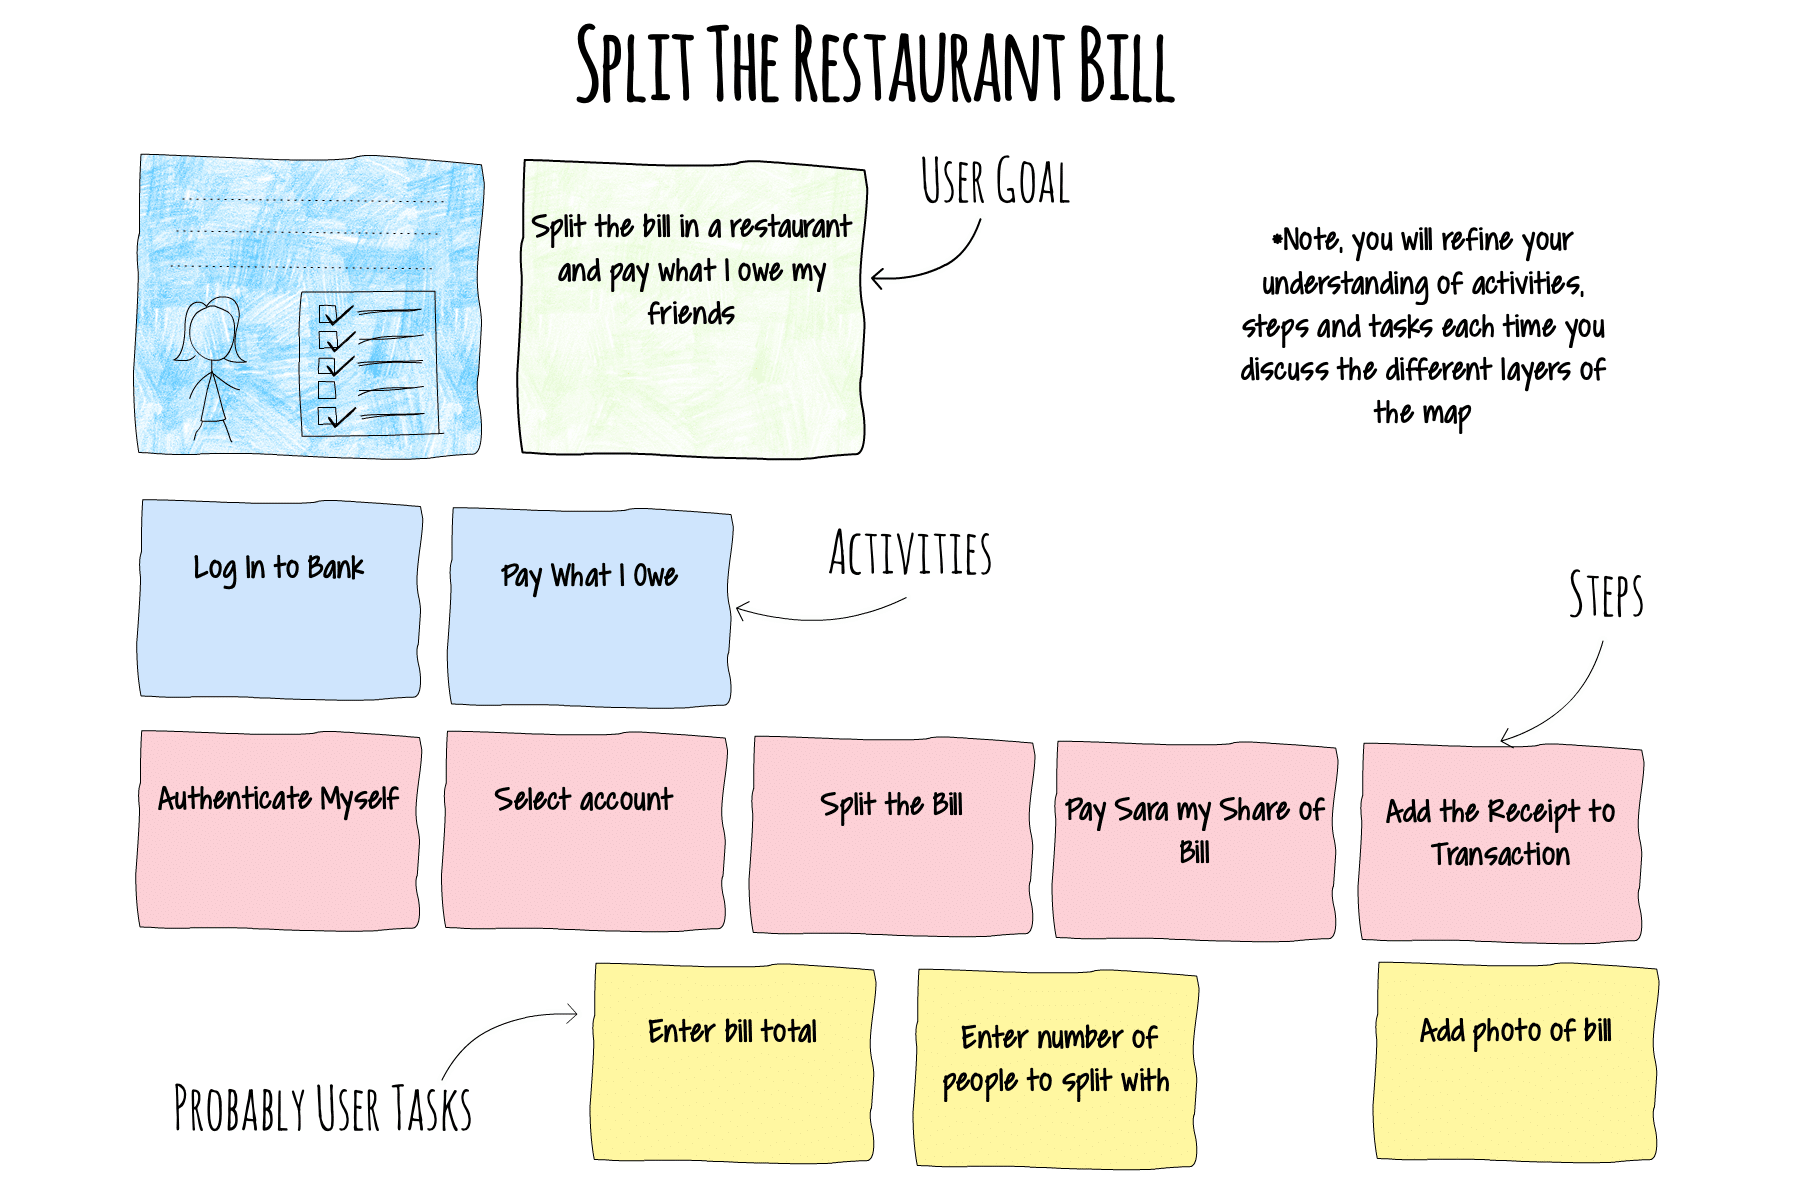
By now you’ve captured some Activities and Steps and maybe even some User Tasks. Think of Activities as a collection of things you do in pursuit of getting something done. Those things that get your Activity done we will call Steps. Steps proceed in sequence from beginning to end and form your narrative. You are mapping the many journeys the user will take through your product in pursuit of their Goal.
- Retell the user journey focusing on the steps taken to fulfil each activity in turn. This is the backbone of your story map.
- The rest of the team write down any steps as they hear them. One step, per card.
- Start your steps with a verb, an action.
- Some users may do things in a different order or with a different option. That’s ok. Think ideal user flow, for now, capture the variations and they may become User Tasks or Steps for new Activities
- Capture and discuss different use cases as they come up – they will be useful later.
- Post your captured Steps from start to finish on the wall.
- Check the narrative flow, discuss, move cards as needed. Identify any new Steps or Activities.
Step 4: Define User Tasks for each Step
 User Tasks are the things you do to complete each step in the journey towards completing your activity. User Tasks are short verb phrases that are the building blocks of a map. For example, if we were crazy enough to build a messaging system then “mark a message as read” might be a task under the step “Check messages’.
- User Tasks can include; sub-tasks, alternative tasks, exceptions, details and even UX notes.
- Each person should choose a step in the journey and create the User Tasks needed to progress to the next step. One card per task.
- Some users may do things in a different order or with different options. That’s ok. Grab them all and order later based on what will deliver the most value to you and the user.
- Switch with a teammate and go to a new step. Add any you think are missing.
- Think: If a step has many User Tasks it is large, can it be split into two separate steps?
Your first user story map is done
The first iteration of your story map is done. #w00p If you have to take it down remember to number the cards so that you can quickly rebuild the map when you need it. When I don’t have a wall I can use I always store my story maps in an A6 expanding wallet for easy access. When you next come to map your product you can add different users, Goals and Activities. Soon enough you’ll have enough information in your user story map to decide what to put into a release. As each Step or User Task is built you can literally tick it off on your map and use it as a visual indicator or progress and value delivery.
Planning releases and tracking progress
Once you are happy that you have enough information you can move on to slicing an iteration or a release through your story map – in this case horizontally and just enough to give value to you or your users. Each step in your user journey will likely have a few User Tasks that need to happen to complete it. Some User Tasks will be optional, and some will be alternatives.
Order your User Tasks from most important to least from the perspective of the user. Think about what is necessary, what is nice to have and what will be used most frequently. There are plenty of models out there from Kano to Jobs Mapping to help you with this. Hopefully, you have some UX people in the room, and they can help answer the question or make a good guess before they do some more formal research.
As you work through the User Tasks and steps, mark them as done and turn your user story map into a programme or release planning aid.
PDF format version of the article for printing.
Eben Halford @ebstar @beliminal CC BY-SA 2.5 2019

